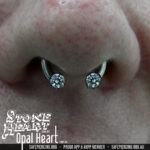
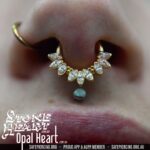
Telescopic septum
History:

At APP one year, I was talking to Brian Skellie (the freehand god) about how I wasn’t happy with my septum consistency. At the time I was clamping with needle blades and I told him how much I missed using Cannula needles or septums as I could “press the sleeve” up against the tissue before driving the needle. This is a bit naughty as you can collapse the thin sleeve easily and inherently cannulas tend to be more painful too.
Brain discussed “telescopic” piercing for doing VCH piercings bottom-up with a needle blade and a slightly shorter cut of needle “blank” as a sleeve. I found the idea intriguing and began using my Dremel to cut off the tips of needle blades and experimenting with different gauges and lengths.
After a couple of “test runs” on some folded gauze (which gives a surprisingly similar feeling when coupling), I did a few on some informed clients and found my accuracy increased from 70% to 80-85% perfection.

You will always get a tricky booger blaster, but I find this method REALLY lets me feel for the right position and also gives me a great visual queue of alignment that I simply wasn’t able to achieve in any other method and significantly decreased. I’ve been doing them this way for the last 8 or so years and LOVE doing septums again.
Required tools:
- Needle blade of matching gauge to jewellery (eg 2” long 14g)
- A sleeve needle blank that slides smooth on the outside of the needle blade (eg 12g)
- Large needle blank to receive the sharp (eg 6g)
- A straight taper matching gauge to jewelry (only required if your needle is not considerably longer than the sleeve blank)
Method:
- Have your client lay on their back, preferably with their head dipped over the end of the bed. This should give you a better view. Sitting may also aid practitioner stability
- Slide the sleeve blank over the rear of the needle and insert taper in the back of the needle (if required for more length)
- In your dominant hand, hold the loaded sleeve with the needle tip retracted. I like to hold the rear of the sleeve in an “ok” hand gesture. This allows me to pinch the needle at the same time while securing it from sliding.
- In your non-dominant hand, hold the receiving blank at the same position
- Place both blanks on either side of the septum and apply light pressure together so you can “couple” the two blanks together.
- Feel for the coupling, which is when you are in the right spot and should be able to easily feel the other side when light movements are made. (o)
- When a client is ready, continue to hold light pressure between the two blanks and use your dominant hand’s palm (or pinkie for smaller hands) to push the needle through the tissue and into the receiving blank
- Remove both blanks and insert jewellery
Pros:
- Fully disposable (assuming a longer needle)
- Increased visibility of trajectory over clamping, which can increase accuracy
- Fantastic on deviations as you have the ability to receive tactile feedback of placement before introducing a needle. This can lead to less discomfort from the client as they can get a “test” of how it will feel and adjust if needed
- Minimal distortion of surrounding tissue due to the small receiving blanks
- Minimal needle drift due to the tissue being compressed
Cons:
- As with any new method, a learning curve and initial unsteadiness is common
- Smaller hands may find it more difficult to hold
- First-timers can find dexterity issues holding in an unfamiliar state
- Not great for rhinoplasty noses as coupling can be difficult as the scar tissue is generally quite dense
Get your video on:
